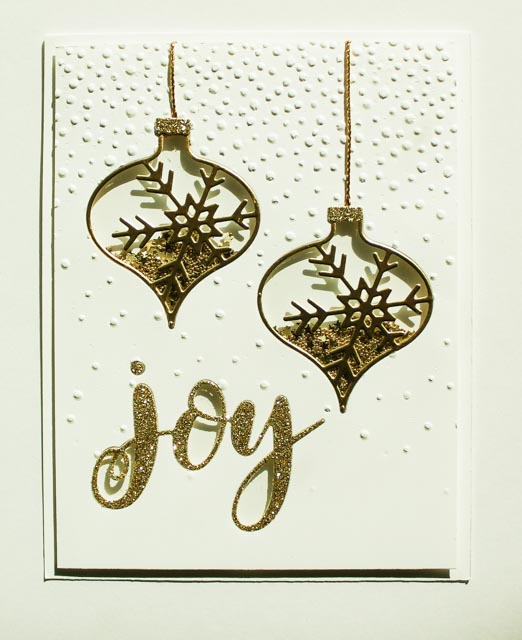
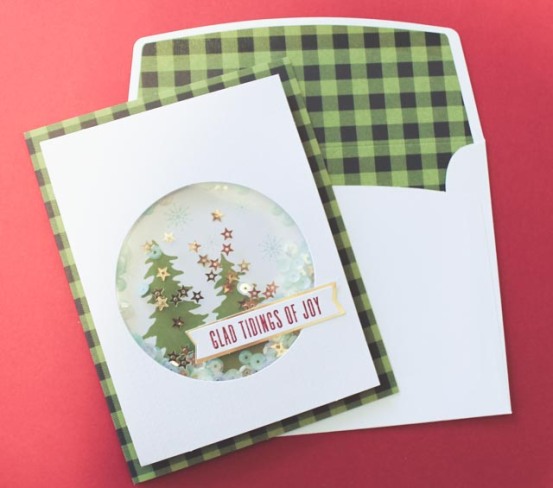
Happy Saturday! I have been dying to show you my latest project. I do believe it’s the prettiest one yet! I had to wait for everything to dry and finally it has!
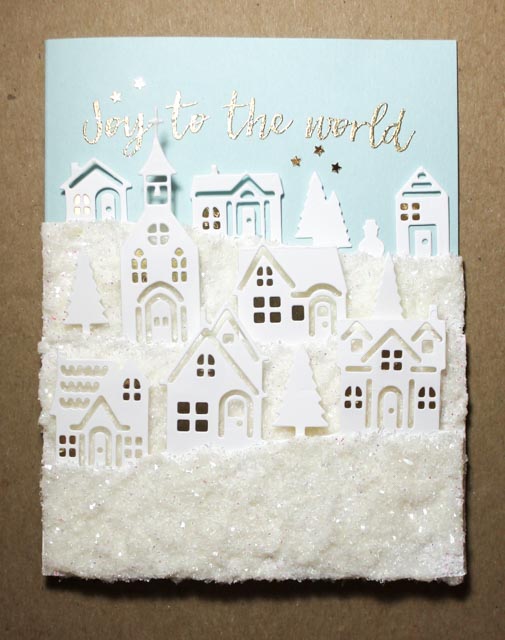
In the picture the snow looks a little yellow. Not matter how I tried to adjust the lighting getting the gold foil and the snow to show their actual colors was so hard! But in real life it’s sparkly white!
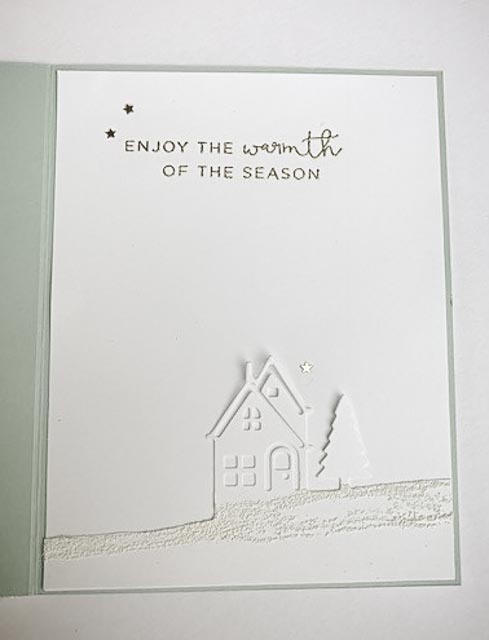
Here is the inside of the card!
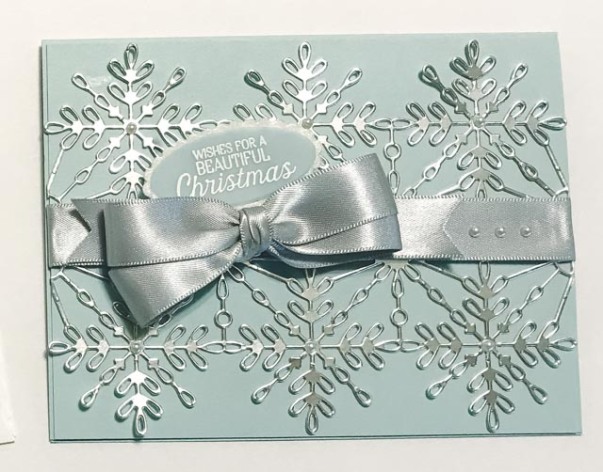
I cased this card from the card in the Stampin Up 2017 Holiday Catalog. If you know me, you know when I case a card I have to add my own touches and make it my own..But with this card I didn’t change much! I mean, after all how can you mess with perfection? :o)
But, I do love the little changes I made. If you look at the card in the catalog it looks to me like they used Gesso..Well, I do love Gesso and love playing with it and the texture it creates. But, I so love sparkle at Christmas!
So I decided to create the look of real snow. I wanted glitter, sparkle, shine! And I believe I achieved it! When I showed my Husband the card, he said “Wow, that looks like real snow” and said it was the best Christmas Card I’ve ever created!
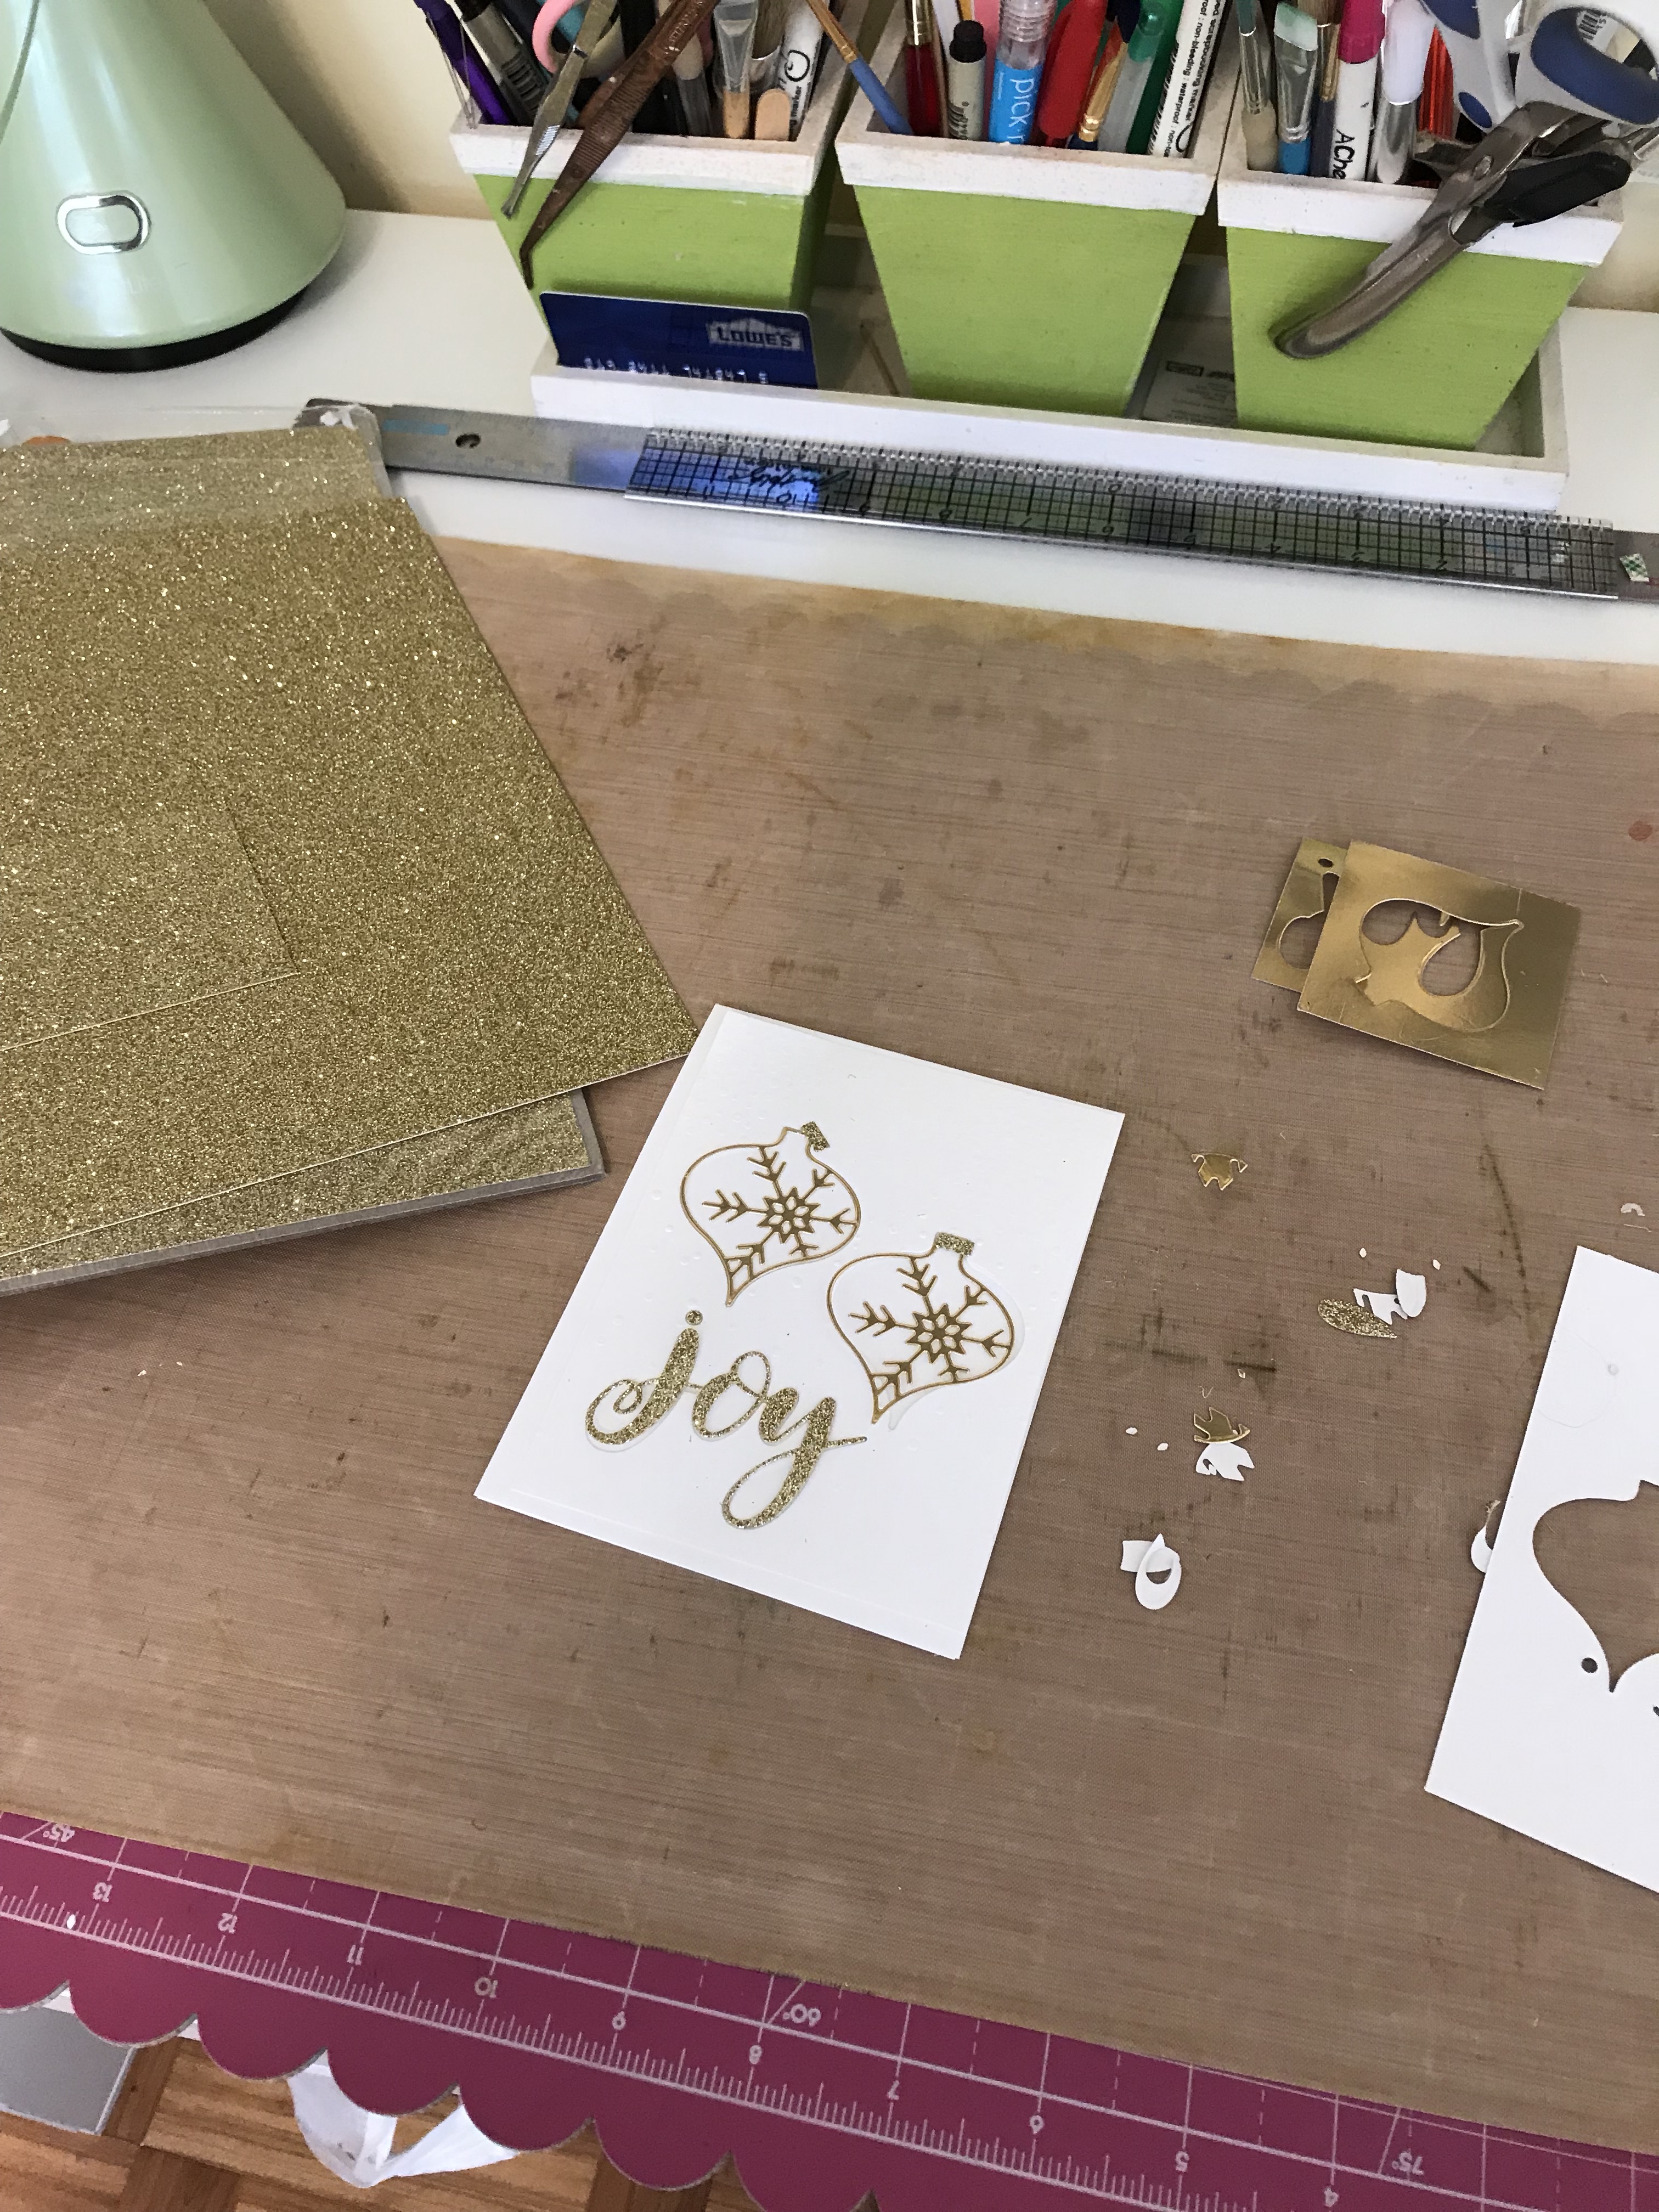
To make the snow. I used Snow-Tex Glitter Snow by Deco Art. It has great texture and really glitters and shines. I simply scooped some out using a Craft Spatula, you could use anything really (a Popsicle stick, an old knife, etc..) and applied it to my layers. Even though the snow tex had sparkle and shine I wanted more texture and more shine :o)
So, I sprinkled Diamond Dust (which is glass glitter) on top of the Snow Tex..and man! It sparkles!
It was so easy to create but the only drawback is you do have to give it a lot of drying time. I let mine dry overnight. Sometimes, great art…takes patience. One thing I do not have a lot of! lol
Here is what I did to create my card…
- I cut a card base 5 1/2 x 4 1/4 out of Soft Sky Cardstock
- I cut 4 pieces of Whisper White Cardstock sized 5 1/4 x 4 (1 for the bottom layer and 3 for the die cut layers.
- I then cut each die cut each scene from the Hometown Greetings Edgelits Die out of the 3 extra layers and trimmed the bottoms to fit the card.
- I adhered some Stampin Up Gold Foil to the inside of the windows on the die cuts.
- I applied the Snow Tex to the 3 die cut layers with a spatula, sprinkled them with Diamond Dust while they were still wet & placed them on wax paper to dry.
- While that was drying, I stamped the “Joy to the World” sentiment from the Hearts Come Home Stamp Set with clear embossing powder and embossed it with Gold Embossing Powder.
- I then took the top layer I cut out earlier and adhered it to the Soft Sky Cardstock
- Adhered the 3 scene layers on top of the top white layer
- Finally, I added some star sequins I had. (Note – There is a star stamp in the Hearts Come Home Stamp Set you can use!) I just had the star sequins laying around and I am trying to use some of my supplies I’ve had forever! ha ha
To Create the Inside I did this…..
- Cut 2 pieces of 5 x 1/4 layers out of Whisper White Cardstock
- Stamped the first layer with the sentiment from the Hearts Come Home Stamp Set in clear embossing ink and embossed with Gold Embossing Powder
- Die cut one of the scenes using the Hometown Greeting Edgelit Die
- Cut off all of the other houses and trees leaving only one house and tree.
- Drew some snow lines using an embossing pen and embossed with White Embossing Powder.
- Glued the house scene onto the top layer
- Added a few star sequins
After I created the inside of the card I thought, wow…If someone wanted to create some quick and pretty cards this would be a perfect card for that! Just think of how fast you could make a bunch of these!
Here are the Stampin UP Supplies I used to create this card:
Product List
If you would like to create this stunning card I would love to help you buy the products and answer any questions you have. The products will ship directly from the Stampin Up Warehouse to your home. To order the supplies just click on my store below.
If you have any questions email me at Stampin2day@outlook.com and I would love to help you and answer any questions you have!
Here is a peek at what I’ll be using to create my next project!
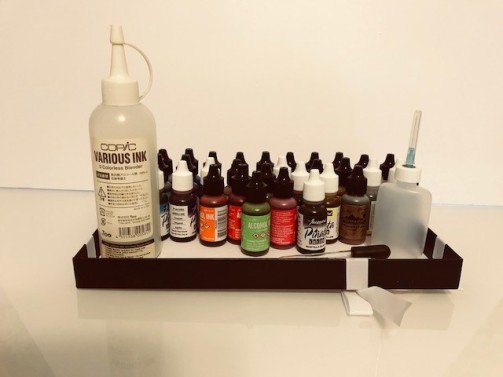
Yep! You guess it! Alcohol Inks! I have seen some gorgeous projects using these and Yupo paper lately and saw a tutorial at Splitcoast Stampers Falliday Fest. I already had some Alcohol Inks from ages ago but I wanted some bright colors and I needed Yupo Paper so I ordered some and they have arrived! Yea!!
I am going to play with them and share not only my creation but any little tips I learned along the way. Come back and see what I’ve learned!
Happy Saturday!
Update: 10/16: CASEing the Catty Challenge blog just chose my card as the “Crew Pick”!